Do-it-yourself concrete tightening of pidlogs. We choose how to correctly tie the screed of the logs on the butt from the video-look.
So the laminate or linoleum lay down ideally evenly, for them to follow the work of the yakomoga smooth, for which it is necessary to live, how to fight finishing screed do-it-yourself logs, the instructions are detailed below. Why better zrobiti її with a hand - to finish it obviously. Aje tse is significant chimalu savings of money (which would otherwise be used to pay for the work of the maistre) and that is not a big deal.
1 Do-it-yourself screed - why start?
The first thing you need to do before you honor the robot is to prepare everything necessary tools, as well as inventory, the presence of some of them using the technology of lining the screed and the logs in the apartment.
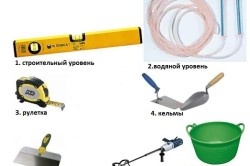
For the priority of zastosuvannya, you will need: hydroroven, olive, weaving thread, tape measure. Also, pick up about those who used a cord, a knitting needle, a clerical nizh, wire cutters, a puncher and a screwdriver, as a rule, a trowel and a grater, as well as a shovel. Part of the robot will be easier to grow, pulling in at the gum's chobots, think about the presence of such traces in advance.
It’s not surprising that, without looming the budmaterials, the screed can only be worked dry, sifted in a didov’s way from clay, like you can build it behind a booth, and then cover it with shields. However, not the best wind, so we stock up the necessary amount of cement and sand. Calculate the amount of money, multiplying square meter(In centimeters) to the height of the fill, according to the standard volume formula. One part of the taken figure is cement, for 50 kilograms of this, 15 liters of water are needed, and another 4 parts are sand. For elasticity, like a plasticizer, add 100-150 grams of a rare mil.
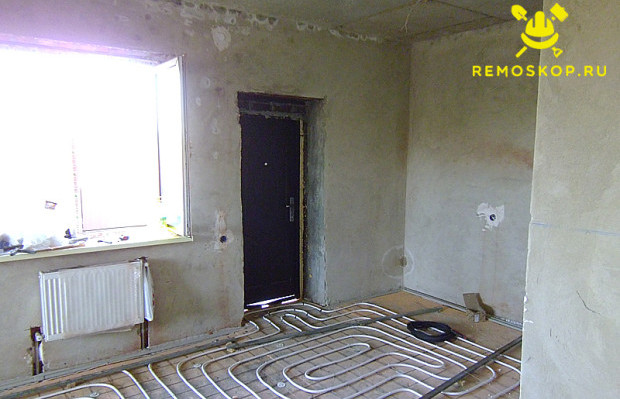
I, zreshtoyu, the process itself. The role of the screed is not only in the fact that it is necessary to vir_vnyati pіdlogu, it is necessary both for attaching pipes of warm pіdlogi, and for the installation of an additional ball of heat insulation or sound insulation in connection with a hydrobarrier. There are differences, and even if you want to take away the heat, having buried the pipes in the tow of cement, you will be vikoristanno floating around. It’s simpler, it’s not on the hard base of the cross, but on the soft balls of thermal insulation (it’s better to use expanded polystyrene, which can be hard enough), on top of it, the pipes are spread.
Maystri site prepared a special calculator for you. You can easily loosen required quantity cement.
2 How to build a screed pіdlogi - sledovnіst dіy
The first and main process is to win over the application, and not to purchase everyday materials, even if you don’t know the front, you don’t know how much cement you need. In front of a lot of work steps, and only having completed the first step, you know, with some numbers, go for the components of the screed.
Meister class screed pidlogs - pokrokov's scheme
Krok 1: Designated horizon and fill level
If the preparation to the screeding of the logs is completed, for the help of hydro-leveling we know the horizon at a height of 1.5 meters and a weaving thread, covered with a crade, robbed of a line of marking.
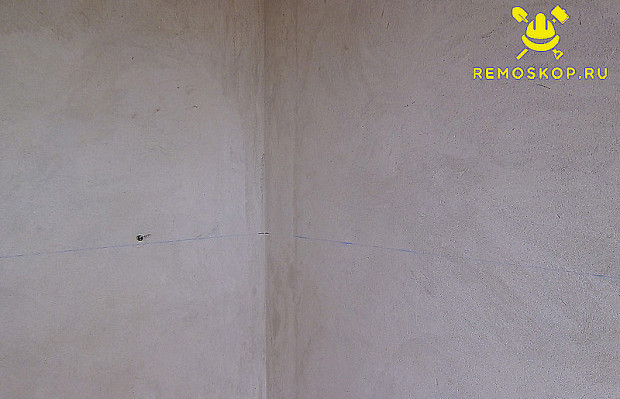
Then let’s freeze with a tape measure, and we’ll know to find a new point and get closer to a new one, by the same time, having determined the difference in the price of the recipient 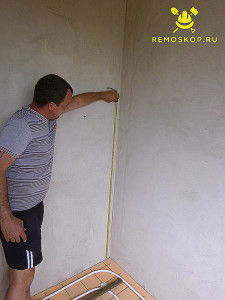
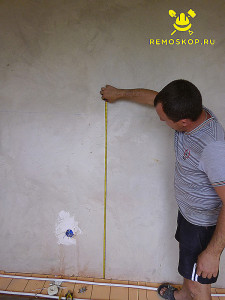
Vykhodyachi z vimiriv, you can unravel, how to correctly fill in the screed of the sublogs, as well as the amount of materials that you need. become 40 mm. We finish the marking work by transferring the markers down the ridges to the filling rib and adding a thread of new lines, which will pass the new surface of the base.
Krok 2: Foundation preparation
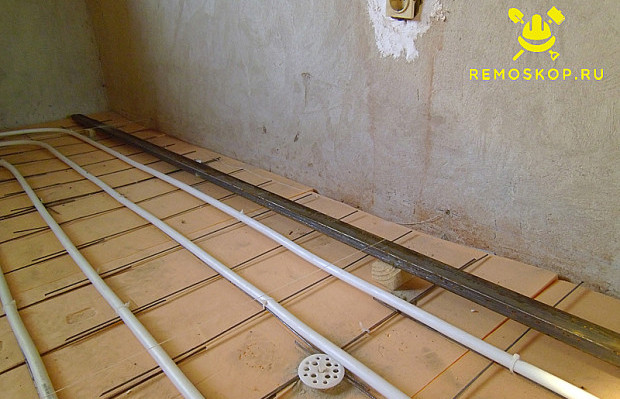
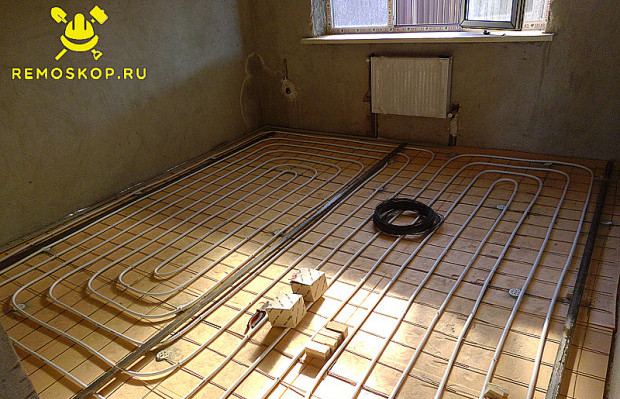
The next stage is the preparation of pidlogs for the screed, not requiring special labor costs, as in the case of finishing coats, it is planned to create a heating system.
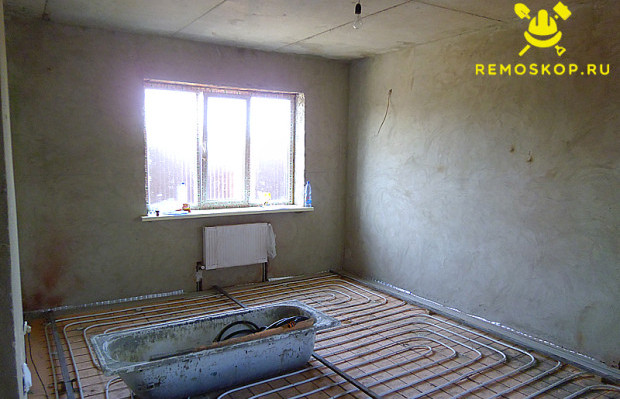
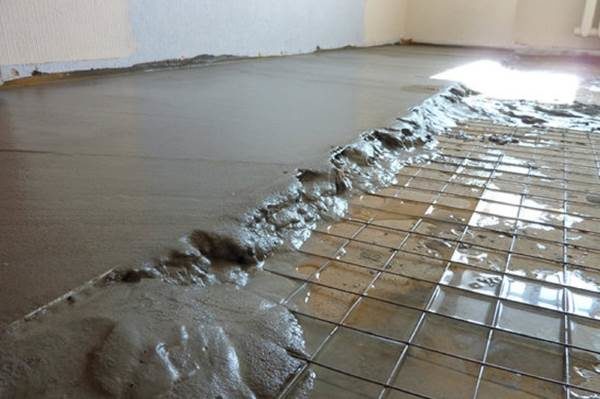
The role of the lining in this case will be put on the insulating, water-reinforced slabs of overlapping plaid waterproofing. An armored mesh is laid on top, and on it - metal-plastic and propylene pipes are bent behind a singing scheme (a snake or a spiral), fixed with special fastenings. If the pouring of the heat screed is planned for the electric hot water heater right on the ceiling, it can be cleaned and heated up.
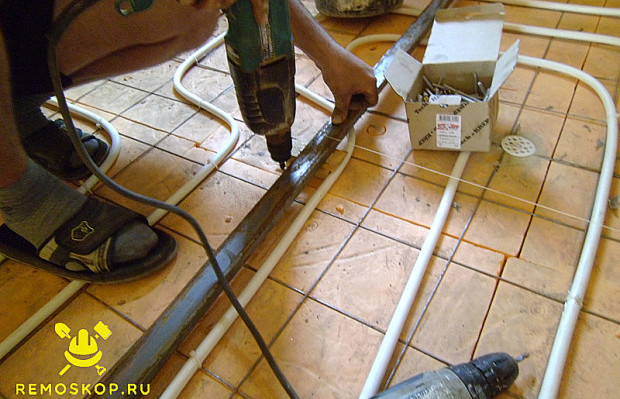
Krok 3: Installation of lighthouses for a river
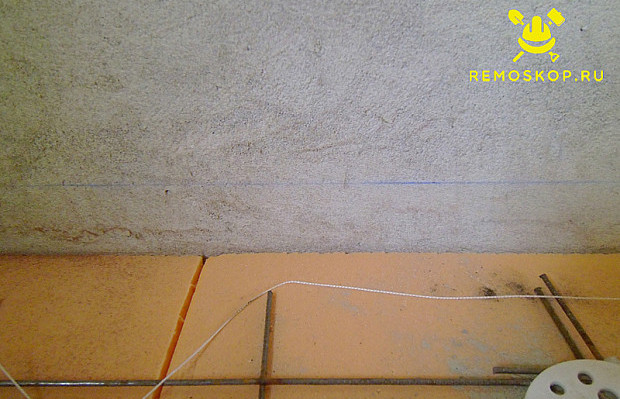
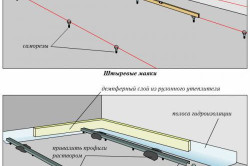
Having reached a pleasant place, I will establish a foundation or lining with an insulator heating elements, the time has come to move on to the installation of beacons, without some attachments, the screed for heat is not possible. For this, in two places, the wall along the line of the future screed is driven in through 1-1.5 meters of dowels, to which we tie a cord (kapron can be used).
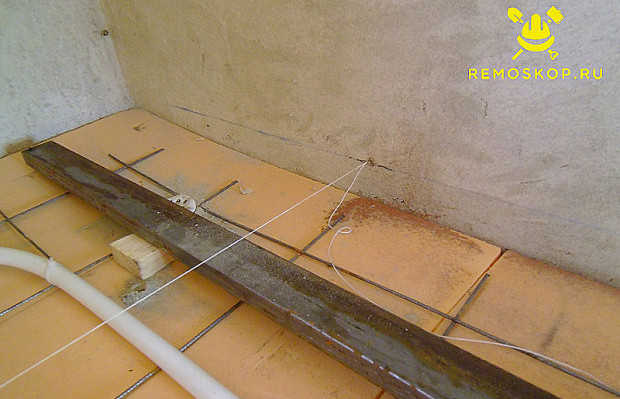
Equally along the strings stretched in the same plane, lowering it behind the additional wooden wedges, we place parallel beacons through the equal gaps from the metal profile 20x40 mm (two per wall).
The stench is necessary in order for the screed to warm up on them during the year.
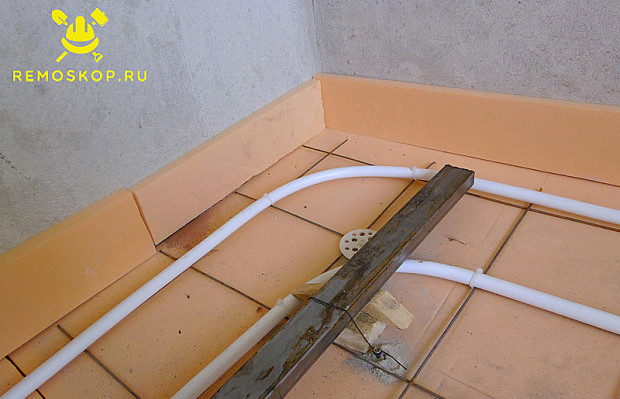
Krok 4: Fixing lighthouses and installing a thermal seam
Shards in the process of laying the difference between lighthouses can destroy and change their position in the open space, they should be closed. At the crossbar, open the hole, in the yak it is screwed on a pair of screws from two sides in the profile, on a small wall in the skin of the skin, it is trumpeted in the middle.

Let's wind on the screws with a knitting drіt so that the beacon will show up hard fixings on the place.

There is an increase in thermal seams along the perimeter of the application, having fastened the belt from the excess insulation along the lower edge of the walls with rare flowers.
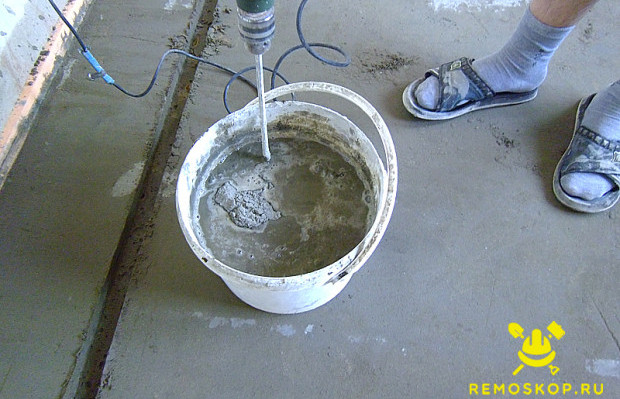
Krok 5: Mixing the difference
Later, beacons were placed around the room, thermal seams were fixed on top, the time had come to start preparing the screed of the pidlog. For retail, we take 50-kilogram bags of cement grade 400, no less, the sand is sold by volume or by cubic meters, for robotic yoga you need 4 times more. Obviously, at a great capacity, which can serve as an old bath (it’s better to put a compact mobile concrete mixer), mix cement with a squeak in proportions of 1: 4; if the warehouse becomes homogeneous, add water. The consistency can be like a thick sour cream.
When adding a plasticizer, we should carefully protect, overdosing, bring it up to the process of hardening the warehouse.
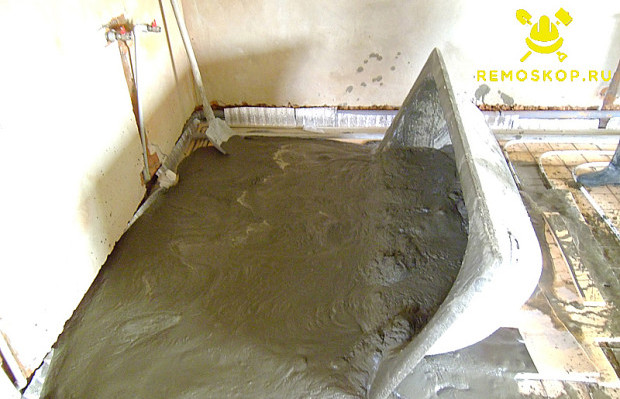
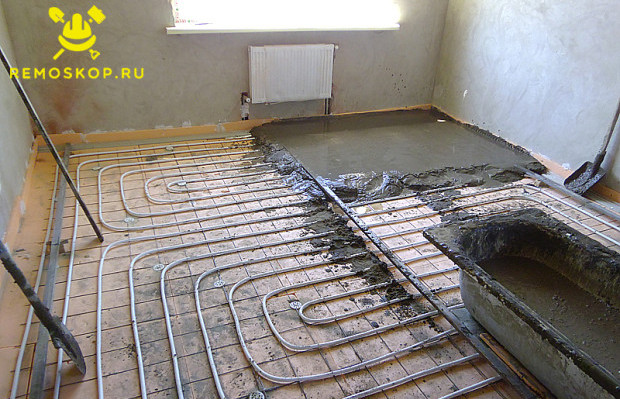
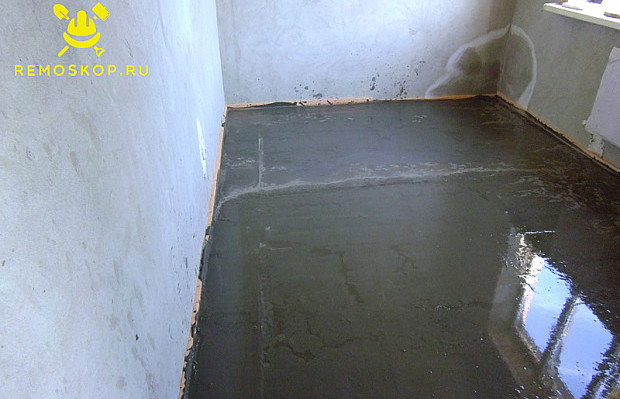
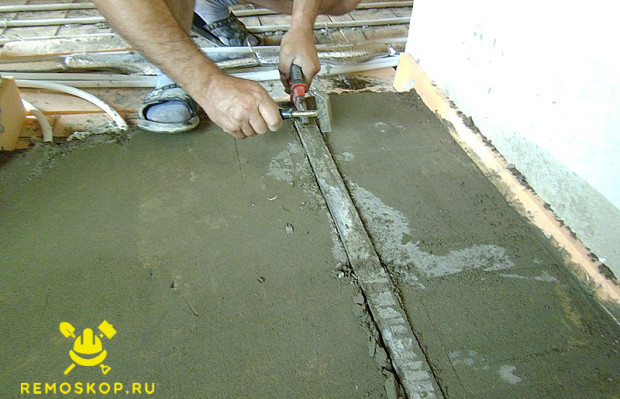
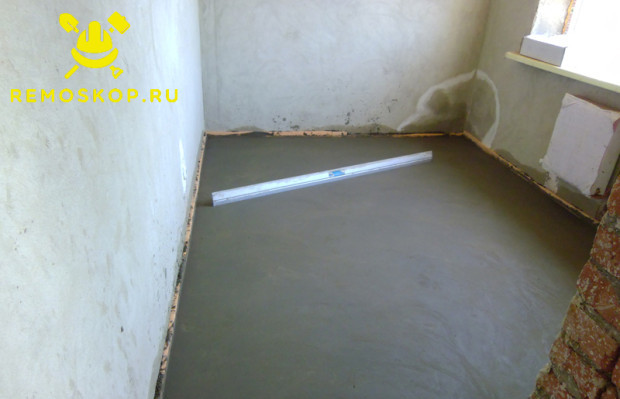
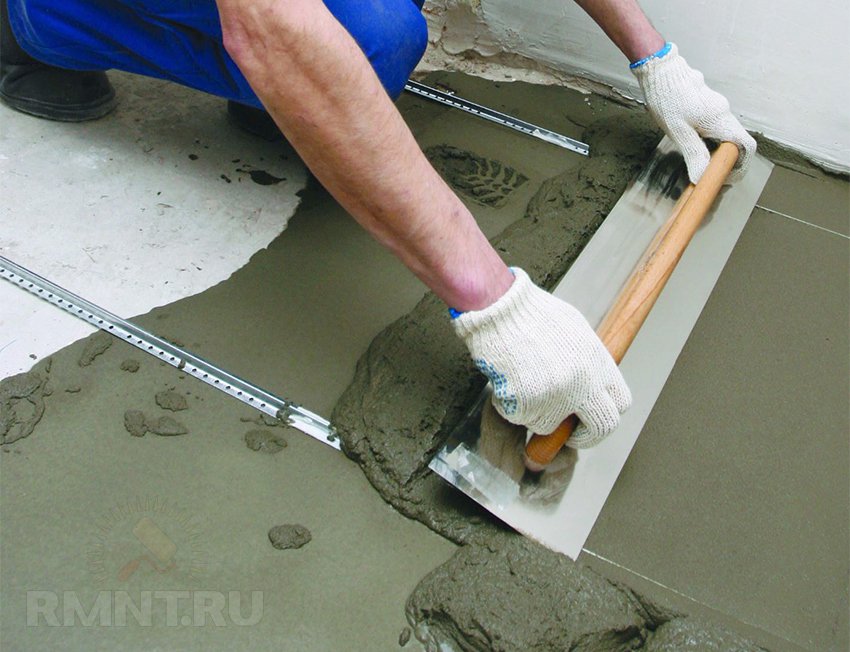
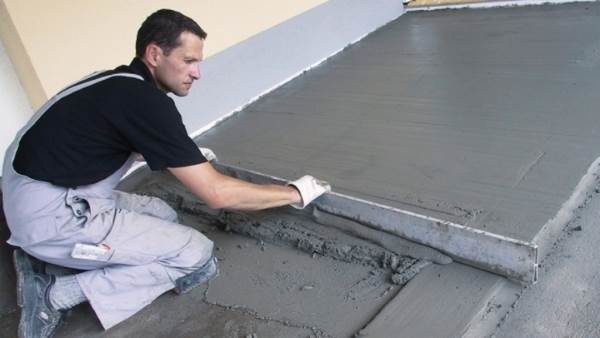
Krok 6: Filling and leveling with the rule
As soon as you have prepared a water heating system in view of laying on the pipes, laying warm underlays on the screed, not with the help of the usual special technologies.
Reconcile, that a small portion of the rozchin, put on the equal place, lightly drenched, but does not swell with slurry, so it proves to the depleted thicket. Then we just flood the summish land between the wall, which is opposite the door, and another beacon like it (the first one is guilty of hiding under the name).
Rozrivnyuemo razchin for help shovel.
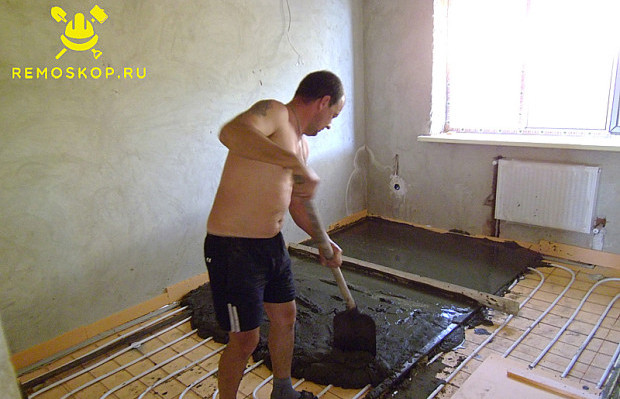
Razrivnyuemo razchin
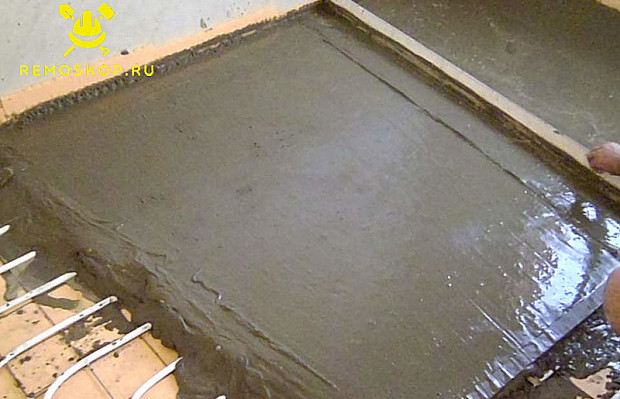
For the additional help of the rule, it is enough to bring the sum of equal beacons.
Krok 7: The nuances of virivnyuvannya that vidallennya empty
Tim, who is not in the best of his abilities, marveled at the beginning of the video, how to properly work the black screed with his own hands, the video shows you a simple way to achieve the best result without flaws.
For example, few novices know that when working with the rule, it is possible to spread the lines in such a way that the wines are three times higher than the lighthouses, even after the shrinkage of the wines becomes equal to them. For the obviousness of the system, heating the screed with a screed without an empty one can be done by a simple method - lightly press the reinforcing mesh, so that it sums up the pipes from the sides.
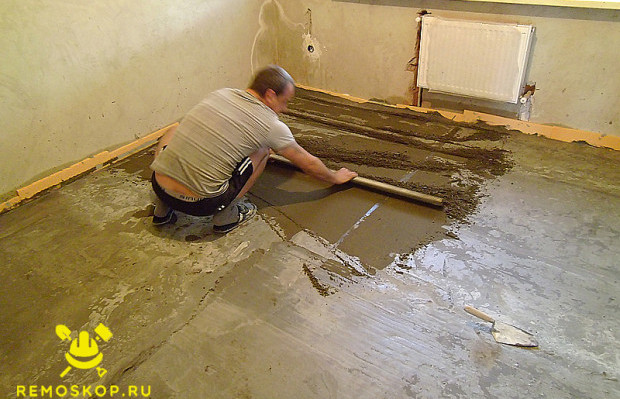
Krok 8: Revisiting the rule after hardening
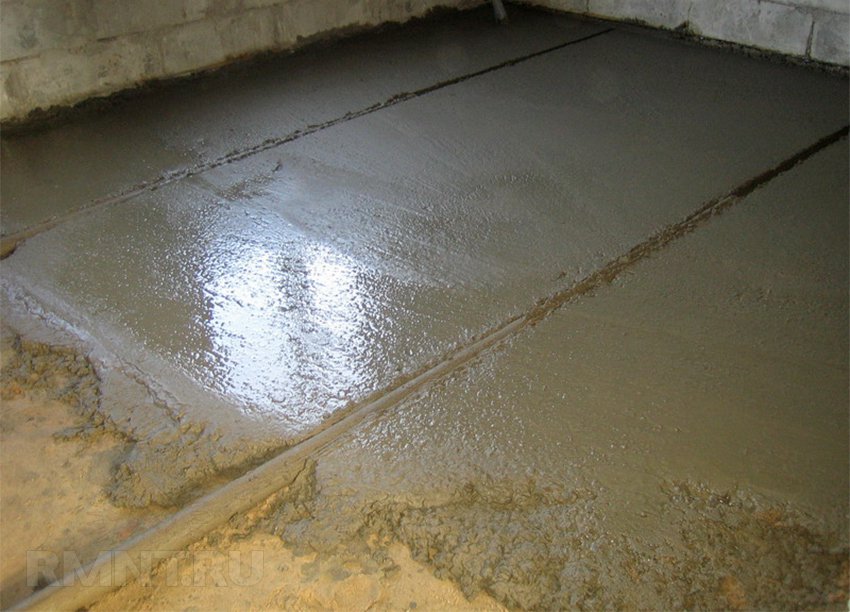
If the cement rozchin covers the entire area of application, it’s a good rule to bring it up, right to the rare summation, for which, well, it’s necessary to prepare the gum’s chobots in front of them, like laying a screed on the bed.
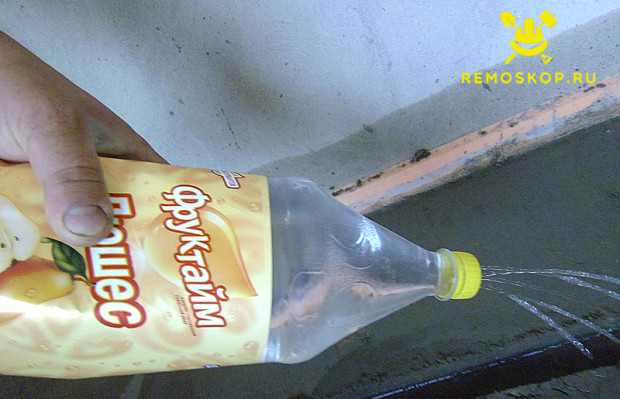
In the distance, only checks are left, if the filling is caught enough, so that it can be overwhelmed. As a rule, an hour of hanging screeds and screeds takes no less than two tizhnivs, it is necessary to soak the surface with water regularly every other day. After hardening the cement, take the rule and remove the top ball to the lighthouses, removing the excess from the wind.
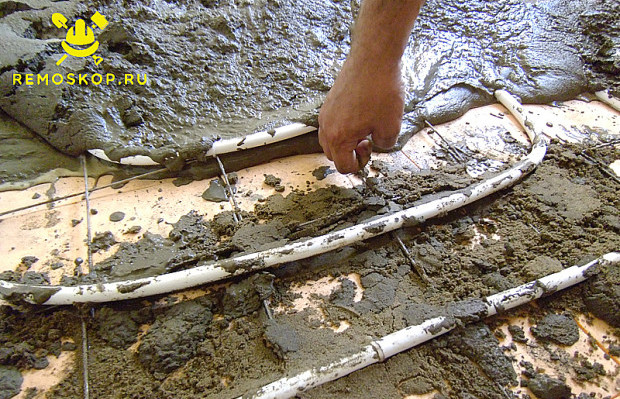
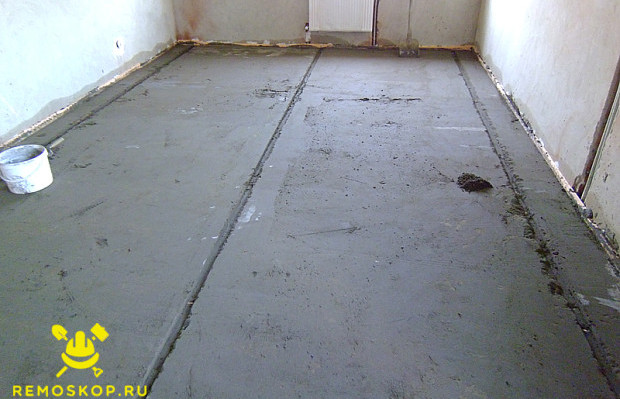
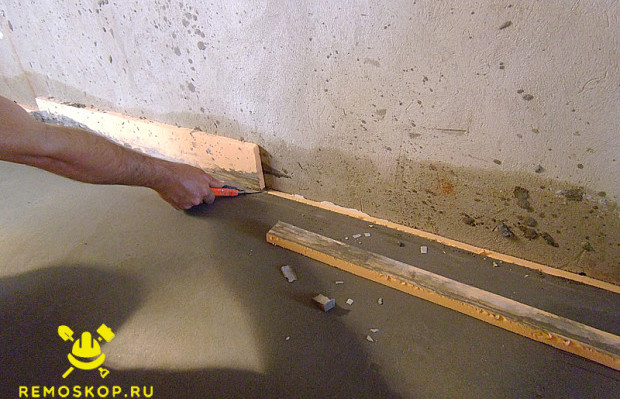
Krok 9: Vision of lighthouses from frozen cement
How to complete the attachment of the screed and the logs, the video is supposed to be the best, there is nothing folding in the same way, and there is no need to finish the instructions. After that, as the surface became equal, and the lighthouses were given to the ball of difference, take a spatula and carefully cut through the torn fill along the sides of the profiles.
Then, with wire cutters, we snack on knitting drіt and viymaєmo trumpet, tapping on them with a hammer in the process, in order to break the layers that have stuck.
The empty ones, which are lost, are wetted with water.
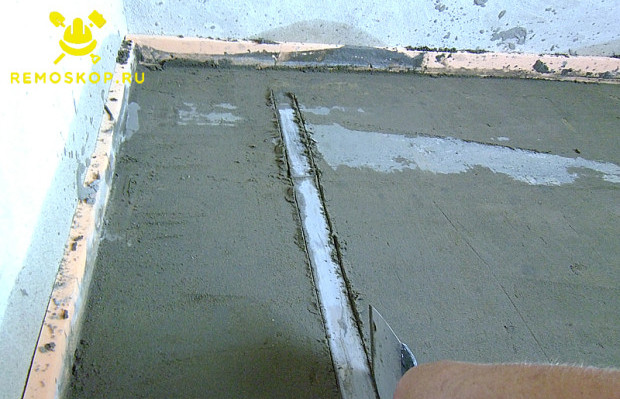
Krok 10: Filling with cement empty beacons
Shards on the surface through the lighthouses began to be made nervous, the installation of the screed and the logs must be brought to an ideal state.
For which, in the construction of rozchins, which rooms are near the wind, we add a little bit of fresh cement and water, relatively zamіshuemo and fill in the crushed grooves in the profile pipes.
Continue to level the surface of the screed
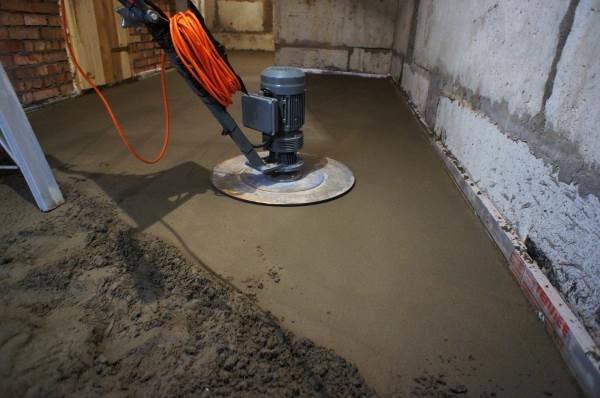
If the surplus of cement-food sum will be removed, we will be left with nothing more than rubbing of screeds and screeds.
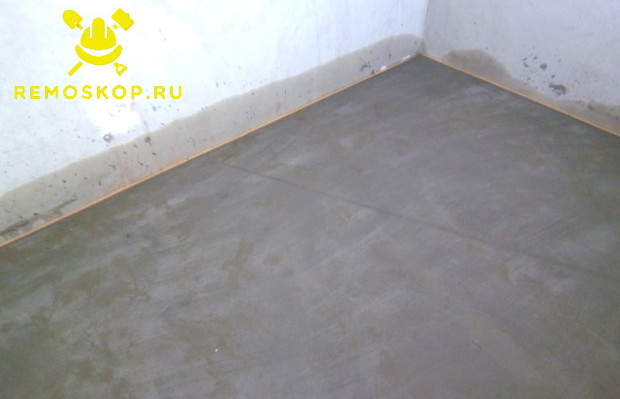
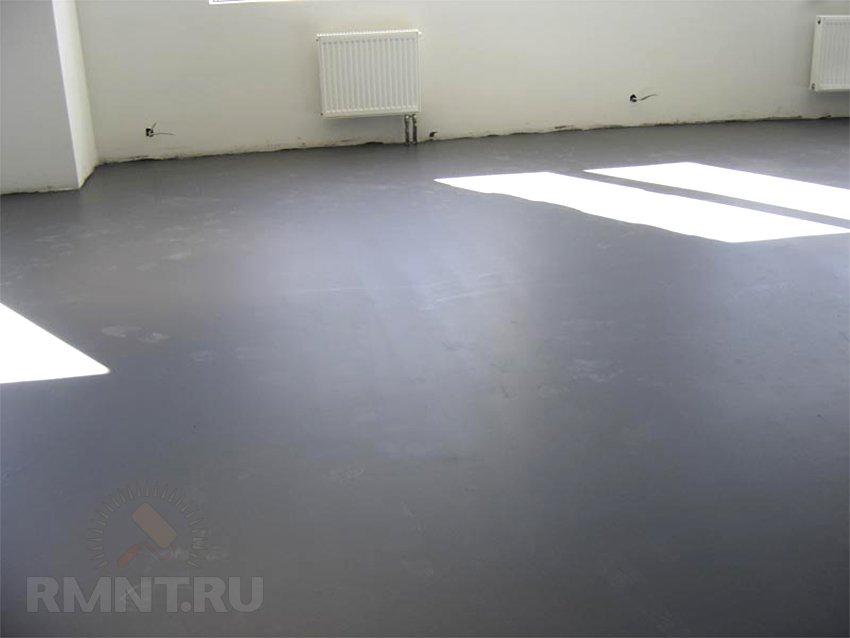
Rush out for help grater that drive. We begin in the sight of a distant place where the place is, lightly dampening the filling with water, tarely smoothing the surface with a grater.
After the completion of the "polishing", if the basis of the future looks like you have done, with a clerical knife, we cut the excess thermal seam flush with the surface, the stitch will be riveted under the plinths with a year. Now the work has been successfully completed and you can move on to the next destination.
Support for tax cover, vikonuetsya over the intersurface slabs of overlap or a few balls of clay and crushed stone on the ground. Vaughn virіvnyuє surface, step by step rozpodіlyaє navantazhennya, robbing the whole structure of the sub-logs of the greater mіtsnoy.
Zastosuvannya rozchina s urahuvannyam vіdnosit tsyu screed to wet types. When you win overhaul pіdlogi, vykoristovuyut cement-pіshchanu sumіsh, like cosmetic repair - ready sumіsh, scho samovirіvnyuєtsya.
Tipi screeds
- A screed is tied. This species is poured on a prepared, ground base. May already have a high rіven zcheplennya with the base, showing high vanity.
- Screed with rozpodіlny ball. A ball of waterproofing material is laid on the base, then a screed is laid. Її indications of mіtsnostі trohi reduced, hydro insulating ball act rolled or coated materials.
- Screed with an insulating ball - floating. If it is necessary to cover with high insulating authorities, choose the whole species. For example, if the insulating ball does not allow heat to go down, but direct it uphill. This type of screed is not the most common, but there are also the most common indications of sound, heat and waterproofing.
Explain like this:
Alternative screed options:
Preparing work before pouring concrete screed
Rozmіtka - zero rіven
For the help of a water or laser level, a rosette is applied along the entire perimeter of the room. Come out zero rіven pіd screed. The laser beam is installed in the center of the application and to carry out lines from yoga changes. If the order is less watery and tape measure, the process will be more laborious.
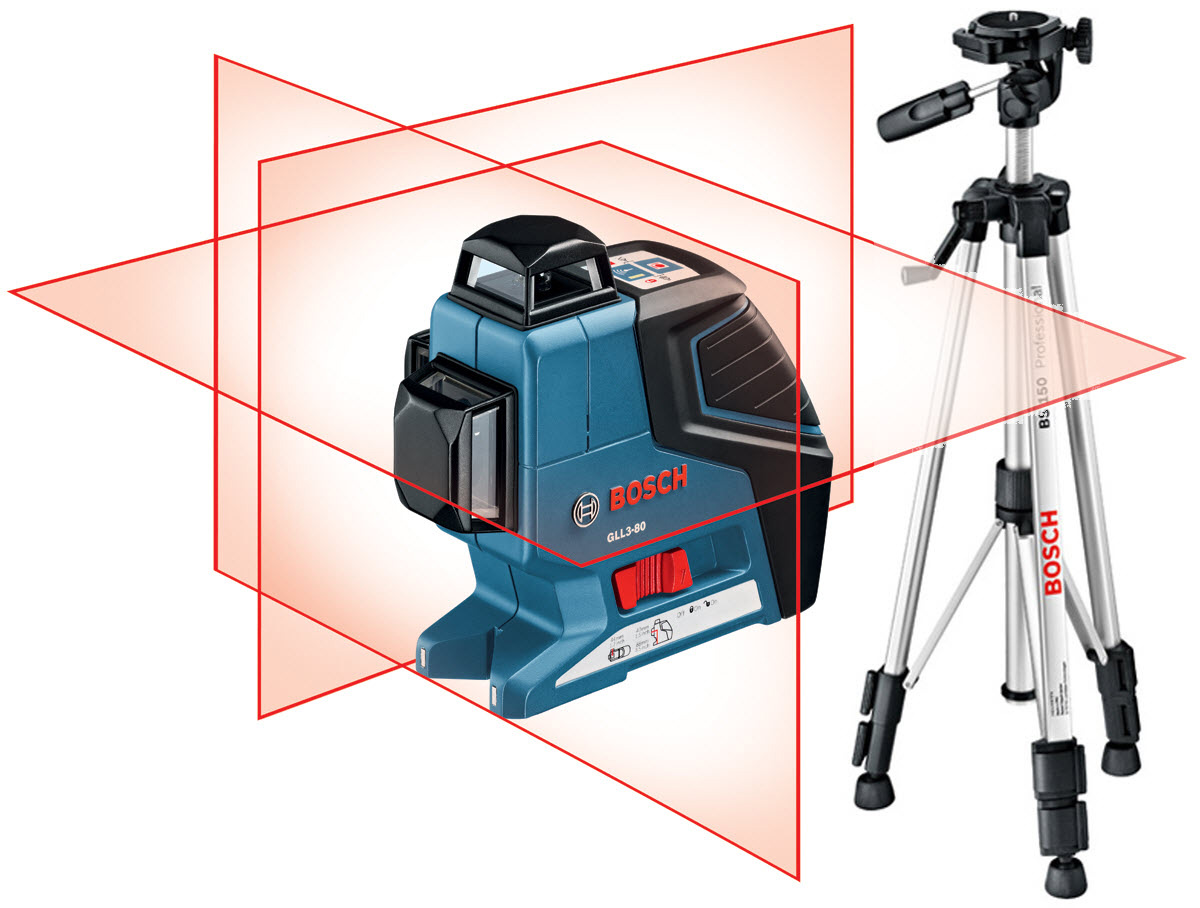
Laser rіven, scho self-verify
On the wall, a mark is applied on the height of the second meter. Apply a tube of water line to the gap at the center of the mark, apply the other end of the line with the tube to the protilezhny wall and move it uphill and down, pragnuchi zbіgu of the line with the base line. Tsyu manipulation to shy on the skin zі stіn, filling in two signs. You can connect them in one line with the help of a wadding cord. For the help of a roulette wheel, you can find the best and find the points in the line drawn to the foundation.
The zero level sign for the screed is as follows: from the height of the foundation to the threshold, you can see the fabric of the possible covering for the underlay (tiles, carpet, and glue). Take away the cut of retail from 150 centimeters and, for the help of a webbing cord, apply it to all walls. Sob in all the apartments, the house of the pidlog was on the same level, the tovshchina to the ball of the screed is calculated on the basis of the finish.
Direct beacons
In one wall up to 150 cm outside the crochet, metal rolls are laid out in parallel. Vіdstan is not guilty of being over something great, so as not to overthrow the old rules. The space of the rosette is marked with olive and prepared to open for screws. Samonarizi are twisted lightly and laid out on them little tufts.

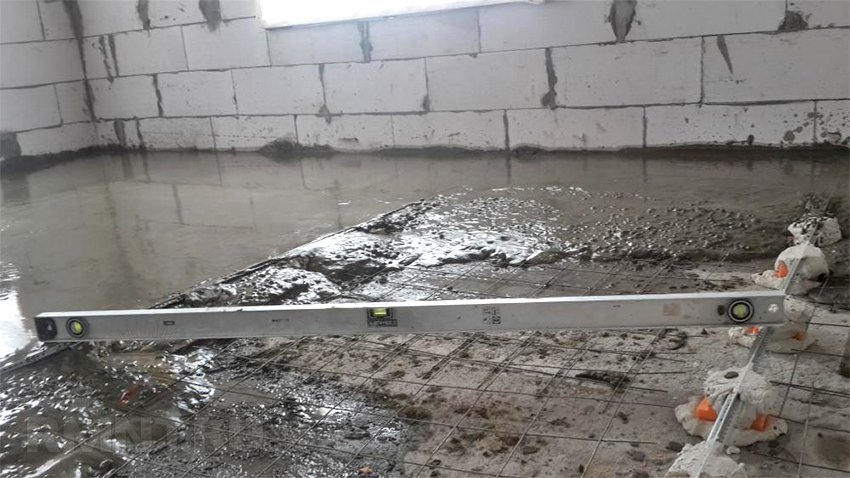
For the help of the rule, the horizontality and the zbіg of the upper point with the zero sign are vibrated equally. You can adjust the height with additional screws, twisting or twisting them. Fix directly with cement-sanding rozchin.
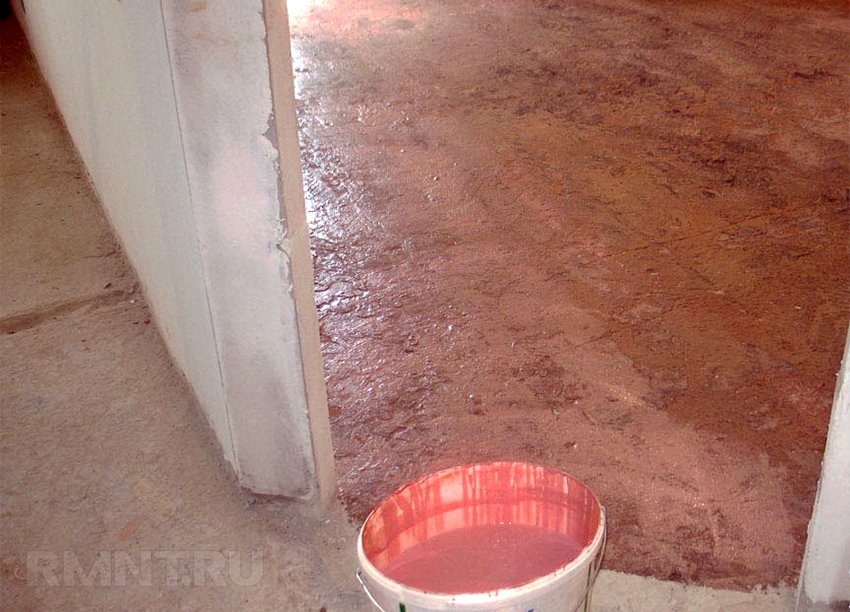
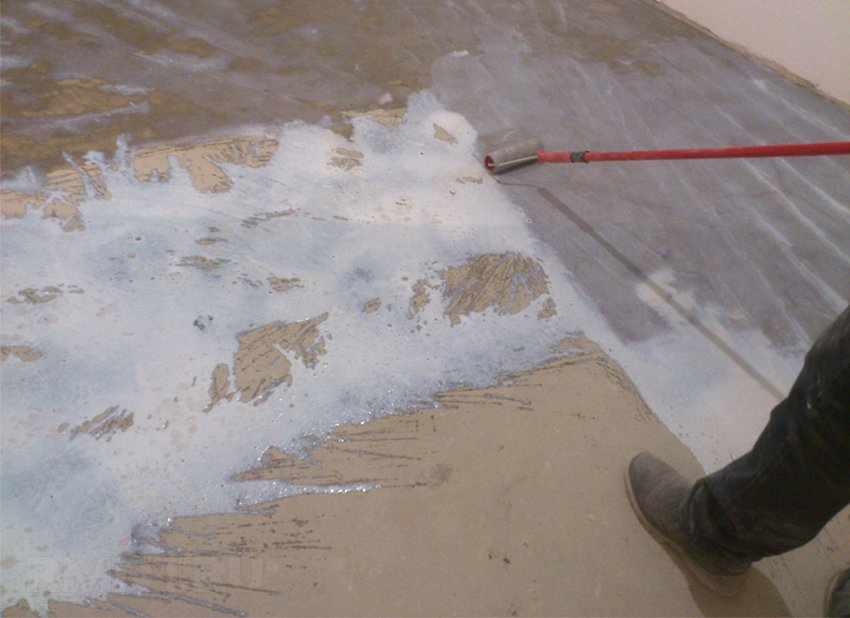
primer
The primer is recognized for the standardization of porosity and adhesion. On porous substrates, dilute the primer with water; on smooth substrates, do not add water. First, choose a primer, you need to familiarize yourself with the instructions on the packaging.
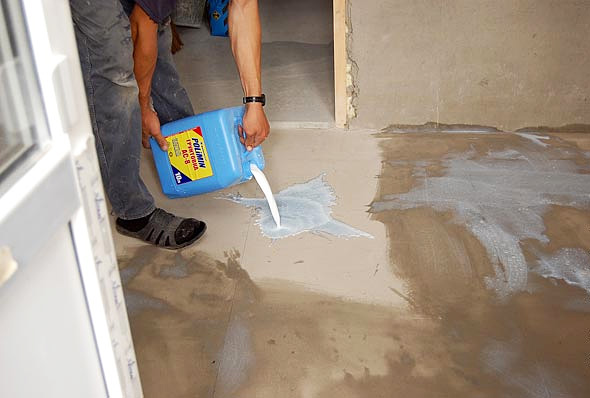
Adhesive primer
Apply a deep penetration primer with a roller. If it's dry outside, all the kuti and sticks of the walls are smeared with insulating mastic, as if it were so dry. Adhesive primer is needed for a good adhesion between the screed and the black surface, it is resolutely smeared with it all the surface and hanging. For the promotion of mentality, reinforce the screed with mesh.
Filling the screed
To mix the screeds with a vicorist, use a concrete mixer or mix with a mixer at the core or a special large tray. At the same time, the bag hangs dry sumish, step by step, add water and mix it. The finished bag has the consistency of thick sour cream. Rozchin vikladayut mizh direct and roztyagyuyut rule. Repair the robot from the kuta, right up to the door. The minimum size of the ball without reinforcement is 2.5-3 cm. If it is necessary to support high ambitions and be reinforced with mesh, then the size of the ball will increase to 5-10 centimeters.
I’m ready to dry the screed, it’s a necessary zahist in the form of an uneven one and a superficial hanging. Drying is borrowed from two to three days. After a few days, if you can walk on the ready-made screed, you will sip on the surface with dry thyrsus, as if wet with water. Don't let the top ball dry out and crack.
The robot needs a visconat in one go, I won’t break more than a little for a year.
Concrete and cement base can serve dozens of years, do not creak and generally do not cause daily problems for the bagmen. Obviously, as all robots are technically correct. Therefore, we propose to you a comprehensive instruction for pouring screeds with concrete sums see different cover it with your own hands.
The essence of virivnyuvannya pidloga screed
Three types of furnishing, if the screed is not the only way to establish even and superficial basis for the distant laying of the clean lining.
The first option is concrete sub-logs and overlaps, which may have significant irregularities and defects. Nasamperede is typical for apartments panel booths, de schіlini between “hollows” and the fork of the fork do not allow the surface to be twisted like a black underlay. Literary overlaps can be seriously littered near the highlands, especially near Novobudovs. In such cases, the screed is fixed using the standard method.
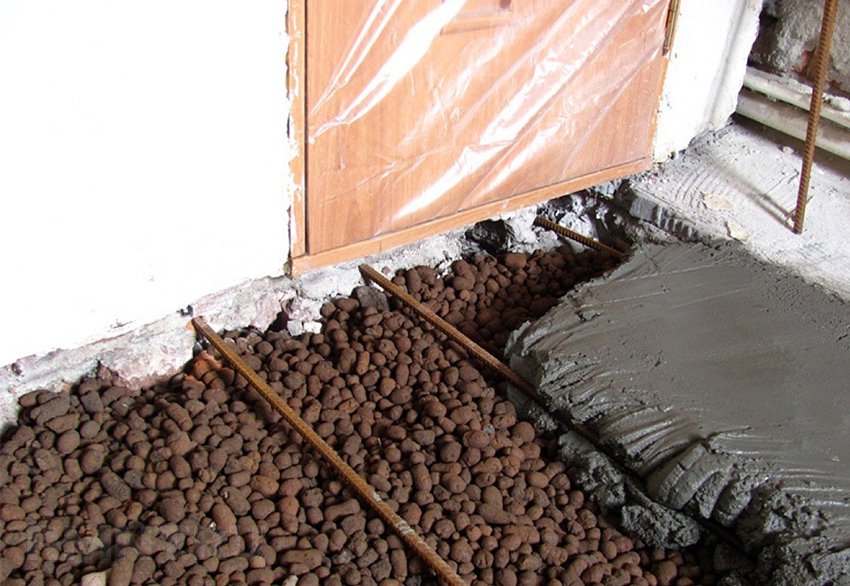
In addition, it is necessary to lift 15-20 cm, if the pouring with concrete is not financially viable. The classic butt is a sublog on the ground on the first version. At this time, the screed is poured on the basis of crushed stone or expanded clay. It is called a screed on a bulky ball, the technology works for the essence of power.

The third option is the most exotic. Even though the mechanical characteristics of black underlays do not allow laying a paving type of coating, the so-called preparation screed is poured on top. The biggest extension of the butt is the tse pidlog in the bathrooms of the wooden houses.
Mayte on the verge: the screed with its goals can correct the central area of the sublogs, so it will eliminate local irregularities when all the underlays are covered with the main ball of the small tovshchina. From a practical side, a screed with sand concrete is the most convenient and affordable way to prepare it practically whether it is a pidlog for a popular type of coating: linoleum, laminate, vinylovy I will type or pour a pidlog.
How to store vicorist
Traditionally, for screed in residential applications, vicorous concrete is used in the proportion of 3.5 parts of sand to one part of grade 300 cement. With screed balls up to 50 mm, such a warehouse is optimal.
With a larger ball, you may need a larger refill. It is allowed to vicorate granite and crack, expanded clay and crushed stone of a fine fraction. It is not recommended to refill with a rim over 15 mm.
For the improvement of these characteristics, sumish can be supplemented with frost-resistant additives, plasticizers and modifiers. To increase the amount of suspense and light revival, you can add a tablespoon of mild water to dishes for 20-25 liters of water.
Cleverly, you can call it a screed that is a bulk pidlog, as it doesn’t help to look at the lighthouses. With a minimum ball of 10 mm, such a screed can cost a pretty penny, especially as the difference between the lower and upper points shifts 35-50 mm. It will be simpler, as if to vindicate the black underlay with the greatest sand-concrete for usunennya zagalny drop, and after 2-3 doby fill in the underlay, which is self-aligned, with the least possible ball.
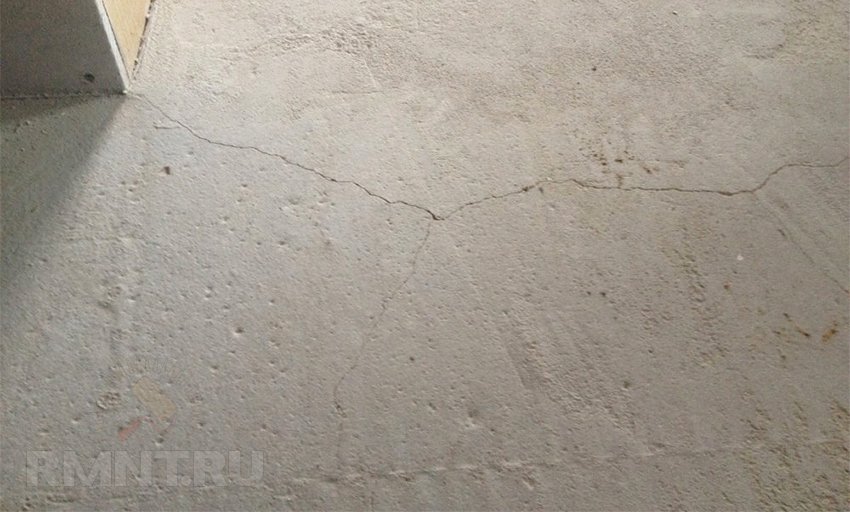
Chi need reinforcement and insulation
Wash the exploitation and the logs can be different. As a matter of fact, the tovshchina to the ball is moving 40-50 mm, the cover can be badly tolerated by temperature expansion and seasonal fluctuations. At 70-80 mm, the closure of cracks is practically guaranteed. If it is tolerable for linoleum and typed coatings, then bulk storage to imagine all the defects and screeds on your own.
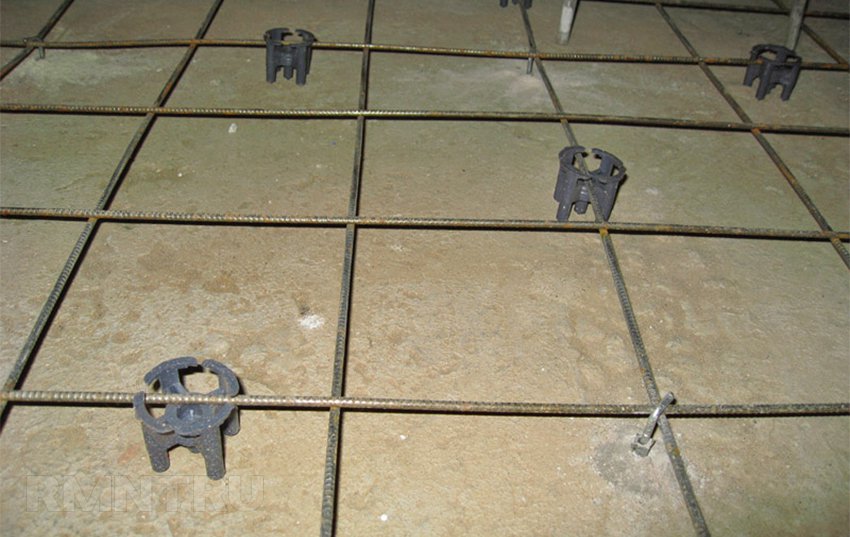
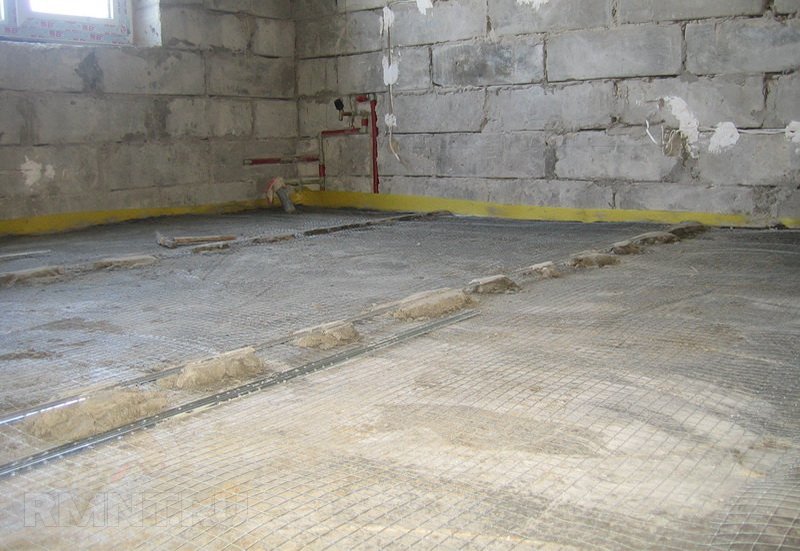
For zmіtsnennya screed vicorist nylon or steel mesh with an average of 30-60 mm and zmіtsnenimi (zvarennymi) peretina. Synthetic mesh is stretched on self-tapping screws, screwed in at the preparation of the pidlog, or on thin knitting needles from the knitting needle, fastened at the sling. It is also possible to lay the grid in a well-filled bag. Steel reinforcing nets for the size of their high hardness can be placed on remote stilchiks.
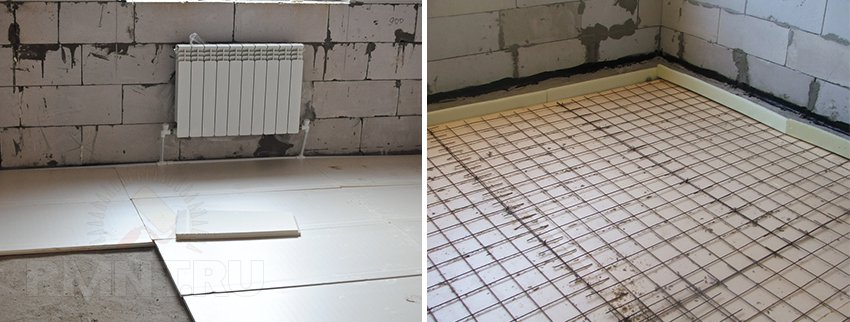
Insulation of cement underlays is also widely practiced. In the middle of the black, if the screed vikoristovuetsya like an accumulative ball for warm weather. Thermal insulation is made with materials that are resistant to even pressure: plates with backing of polystyrene and polyurethane. The thickness of the screed is due to become no less than 30 mm for binding synthetic reinforcement. When laying the insulation on the piping, it is necessary to move it forward with a blow with a ball of 50-70 mm.
The order of vikonannya robit
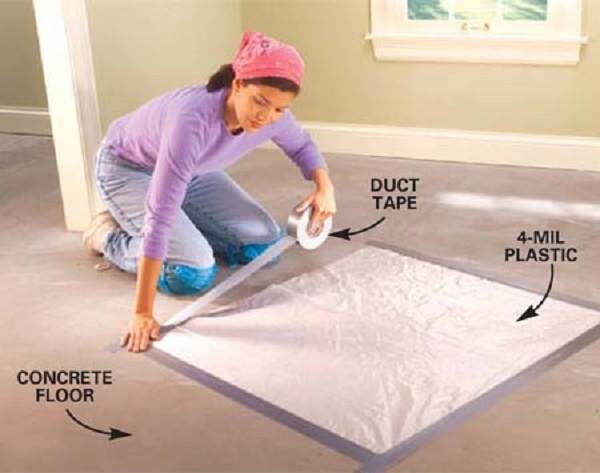
The first crack before pouring is to seal all the gaps and cracks, water can seep through the holes. Hollow slabs of overlapping slabs declare another problem: water can flow into them and not flow from below. Syria of the stele and swelling of the underlay in the nearest pivroku guaranteed, it is possible to install electric lines, laid in the middle of the empty.
Waterproofing needs to be done to a private forgetfulness: a dry wind from the mass does not allow the hydration of cement to be completed in the sum, through which you will not gain the necessary minerality. A word about a screed on a bulky ball: how can such a time be ahead of leakage? Here it is necessary to carry out the filling at two balls with a time interval of not less than that. The first ball is poured directly on the subsipka, wanting more and more often to fold in geotextiles, so that the water does not drown the cement. The upper ball will then form normally, and the surplus flow of cement milk will thicken the masi. Another variant of the wicker attachment is the same for wooden pads: empty, which is poured, lined with polyethylene ply, hermetically sealed at the seams.
After that, as a sub-log it is walled up and waterproofed, and a reinforcing mesh is laid out on remote supports. We give a zero sign on the walls and install beacons. There is no trace of pure alabaster vicory, the wine shrinks. It is possible to carry out prompt installation of lighthouses, pіdmіshuyuchi budіvelny gypsum at the rozchins of a well-prepared zamіsu. After the application of small humpbacks on the underlay, we lay the first smug of the lighthouse at 10-15 cm from the wall and look along the cords. Other times, the smogs are being installed behind the rake or laser level, after laying the third skin beacon, as a rule, the area is turned over.
Sound filling is carried out by two practitioners: one prepares the zamis, and the other one installs the next 2-3 beacons on the leftovers in front of the mixed mass.
Post-stocking of black pidlogs
Speaking about the comradeship of the screed, we may have to take into account the size of the bag after finishing the surface. It is fallow in the form of a sublog cover, it can be processed in a different way, with which the tovshchina can change, so it can change in the boundaries of 0.5 mm.
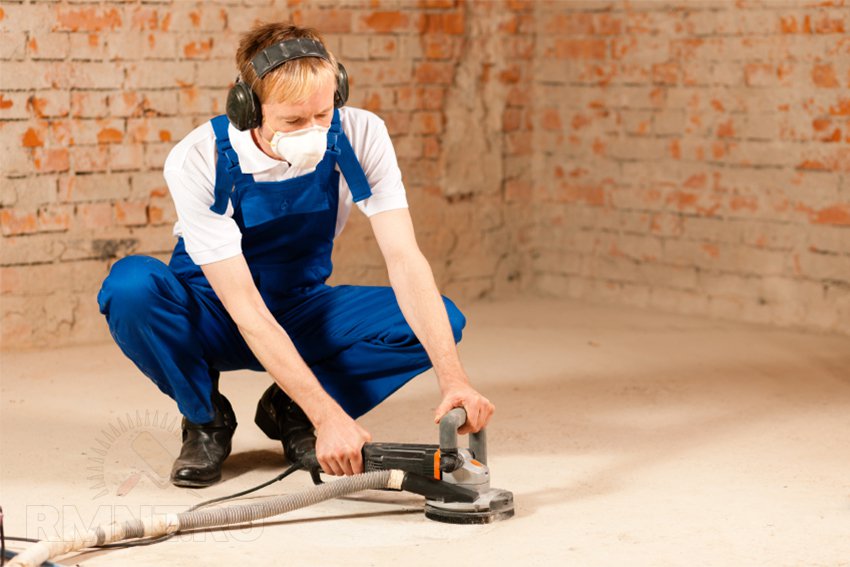
Two of the most popular processing methods are grinding and casting. The first may be on the top of the top ball, molded by a fraction of piska and rare milk, which is unevenly wiped, creaking and sawing. Grinding after the double hanging of the screed. Zalіza, navpaki, zdіysnyuєtsya vіdrazu poslja shplyuvannya pіskobetonu і tsіl nіgo directly protilezhna - zmіtsnіti upper sphere.
If the surface of the screed is not in use, it is allowed not to finish such a work. For laminate, parquet and other types of coatings, it is better to seep the screed with a primer, and then we will do better. Linoleum is to serve as an example here - under a new screed, it will leak out with a 1: 1 polyvinyl adhesive.
To lay the tile evenly and evenly, on top of the primed screed it is rubbed with an adhesive warehouse, which is to be used for facing with a kahl. To help smooth out the unevenness that is lost, change the screed ball over the insulation up to 20 mm from the thick fiber facade mesh, improve adhesion. The surface of the surface is hung over with a grinding wheel to remove the “glaze”, so that the glue for the tile is carefully selected.
Before that, how to build a screed and logs with your own hands in a private booth when repairing or repairing the premises, it is necessary to clearly understand, how to build a design.
On the back of the screed, the screed was turned all the way to repair the base, on a yak without it, it’s impossible to evenly lay the underlay, or reduce the cost of expensive tile glue, a ball of which, in principle, can correct defects and horizontal alignment without a screed.
However, at the construction stage, it is often common to add heat and sound insulation materials to reduce heat loss and reduce the acoustic power of the overlap. The screed allows you to lift the riven cover for the underlay on the height, and in certain situations you can serve as the final cover for the underlay.
Classify screeds for dressing with signs:
Podіl for other signs (materials, hour of laying pіdlogovogo pokrittya, trudomіstkіst) is different, but also injecting a choice of technology for specific operational minds. Therefore, all methods and materials, the variability of processing/repair and the possibility of congestion in applications with different modes of moisture and heating will be examined below.
Concrete screeds
The most popular concrete screed for a private wet-type booth. The dry screed is folded at the ready, but it reverses the technology ahead of the exploitation authorities.
Important! Irrespective of those who have less water in the material of the screed, the terms of the installation cover are not changed. Carpet, linoleum, laminate and parquet can be laid after 2 tyzhnі minimum, tiles are recommended to be laid on the 29th day from the moment of preparation.
To increase the resource of the underwriting cover, before laying the water concrete screed can be found in the boundaries:
- 1.5% - for heat state;
- 2% - for parquet and laminate;
- 2.5% - for jute carpet;
- 3% - for linoleum;
- 3.4% - for porcelain stoneware, PVC tiles and linoleum on a polymer basis.
Checking the moisture content of the screed without accessories.
The simplest way to re-verify the moisture without special accessories is to glue a wide adhesive tape on the surface with a paper servlet under the hermetic material. If the servette is glued through the doba, it is dry on the dot, the cover can be laid.
Classically wet tightness
This technology in a private booth with your own hands is most likely to be installed for the following reasons:
- a concrete screed allows you to lay in the middle of the insulation and acoustic material, the contours of the heat supply (cable, pipes);
- robots can be conquered independently;
- navit with a balloon of 5 cm, the budget for the improvement will be minimal.
Important! It is necessary to vrahuvaty, that when victorious concrete, be it as if it were on top of it, it should turn out to be black-and-white stitching, which means additional decoration, and sometimes even additional polishing of the finishing bulk lining.
The main shortcomings of the technology are:
- presence of wet processes - wet screed is not recommended to be poured in rooms with false panels with drywall;
- foldable walking - to increase the strength of the concrete structure, it is often reinforced with a dart mesh, which can only be moved along the flooring or "paths" from concrete;
- constructional fencing - the wet screed should be smoothly poured onto the ceiling with beams.
The top surface is not ideally smooth without sanding, therefore, when laying the pokrittya pads, the linings and the ball of the pouring pads are often victorious.
Dry screed
The technology behind the locks is troweled at the rest of the stage with special grinding machines. From one side there are sutvets plus dry screeds - the surface may have an ideal flatness without drops, pits and humpbacks. From the other side - without zastosuvannya special possession, the screed of the underlay from the dry concrete cannot be squeezed.
The last disadvantages of the technique are:
- the minimum thickness of the dry screed for the seams is 1 cm larger, the lower is wet (4 cm instead of 3 cm);
- the terms of the laying down of the sub-logic cover are left unchanged;
- in the application, the high water content is taken with a stretch of 3 tyzhniv, which is shkidly for drywall and other hygroscopic materials.
Virіvnyuvannya nap_dry concrete.
Important! The qualification of the majstra may be high, lower at the screed, which is poured into the wet screed. Without practice, it’s easy to learn a home master, how to properly lay, level, and rub dry concrete.
Then, the self-tightening of the “pie” with a dry screed can be increased in water resistance and frost resistance at the same time with the classic technology of wet screed, wanting for more vipadkіv tsі power zayvі.
- like independent finishing coat(Screed-lined);
- for usunennya drіbnih nerіvnjuє, so as the only option, schob lead the ball, scho virіvnyuє, "to zero";
- for combined screeds cement-food sum DSP in foldable paddles.
For example, before that, how to correctly fill the ball, which is correct, it is carried out the equalization and the significance of the highest point in the booth. If this sign appeared far from the entrance doors, then a meeting could enter the cottage, as the quality of living drastically decreases.
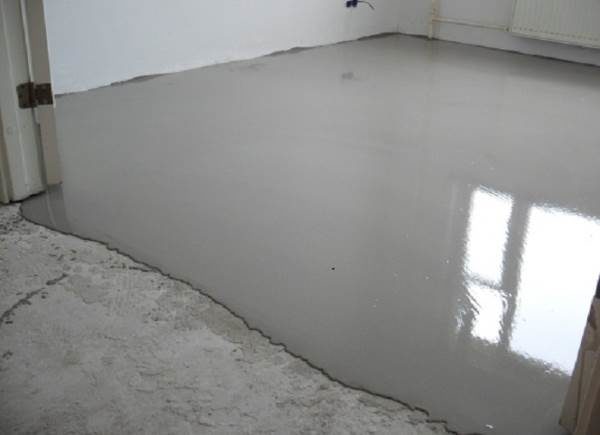
Vykoristannya bulk pіdlogi for virivnyuvannya screed.
At this height, the sign is lowered slightly in the margins of 2 cm, large differences in the horizontal level are poured with great concrete, and the rest of the leveling is vibrated with a bulk underlay, which self-levels, “to zero”. An uncultivated plot, which has been abandoned, with a difference of 1.5 - 2 cm, is practically unremarkable and does not add to the quality of living.
Important! The pouring of the pipeline is economically docilly only for the elimination of differences at the boundaries of 2 cm. In other cases, other technologies should be considered.
It is possible to create a full floating screed with the contours of the heat underlay, the axis of such a screed with the installation of pipes (heat water under the water) of at least 5.5 cm (35 mm higher than the pipes), with such a screed the screed is practically “gold” and there is no sense in whom. We recommend vikoristovuvaty podlogu pouring there, where you need to vyrivnyat small differences (up to 2 cm).
More than 70% of private cottages do not make slab overlays, and preparing wet and dry screeds for overlaying with beams is impossible in principle. In a number of vipadkіv, it is not necessary to use wet technologies to overcome the moisture content of plasterboard partitions and equal beds.
The deputy may not be in charge of the 28-day term for the set of concrete materials, so that the building will be put into operation earlier. For individual forgetfulness, it is necessary to ensure high repairability of the screed and communications under it.
In all appointments, a dry screed with sheets of chipboard, plywood, GVL, SB or CSP over hard materials - granots, slag, quartz sand and expanded clay.
A dry screed is actually a floating deck on a rozdіlovy ball. Tse is the best option for a cottage, in which there is a technical support and a povnotsіnny underground on top:
- expanded clay has more thermal insulation power, reduced heat consumption, increased energy consumption;
- soundproofing is improved, which is relevant when placed in the technical pipelines of the pumping unit, dzherel uninterrupted life, emergency generators.
A dry screed made from glued sheets of GVL is not seen by vologists, like concrete, which is poured in a wet way, but it is laid in a dry way by sumish CPS.
Important! As a victorious insulation and soundproofing material, the basis is the mother's fault for the reserve of materiality for the structural innovations that have increased.
To compare the basic technologies of screeds, their main characteristics are listed in a small table that helps you choose the way to prepare a private cottage or an apartment:
| power | Screed technology | |||
| wet | Bulk pidloga | drunk dry | dry | |
| for some overlaps | pіdloga on the soil, slabs of overlap | sublog on the ground, slabs of overlap | sublog on the ground, overlapping slabs | overlapping on beams, slabs, underlayment on the ground |
| installation of heat pipes | electric or water, vmurovuetsya at the screed | electric or water, vmurovuetsya at the screed | electric or water, stacked over the screed | |
| tovshchina design minimum | 3 cm | you can enter "at zero" | 4 cm | 2 cm (without slurry material) 4 cm with expanded clay slurry |
| hour of laying the tax cover | tiles after 2 days, reshta after 1 day | tile after 4 tizhnі, reshta after 2 tizhnі | what day | |
| operational resource | with the term of the service of the slab of overlap | 20 years | Night (not less than the term of exploitation budivl) | 10 - 15 years |
| maintainability | zero | zero | zero | 100% |
| the budget and the ability to prepare by the authorities | low cobіvartіst 1 m2 | recommended for a ball between 1.5 cm, so it’s dry to sum up the bulk of the pads, which is self-checking, which is expensive | high qualifications are needed, that road of renting a special possession, a tool, is only visible with great commitments | do-it-yourself installation for a few years, compatibility 1 m 2 lower, lower at a dry screed and a bulk pad |
In this way, in a private cottage, a screed can be poured from the sum of the CPS and bulk pidlogs, prepared in a dry way, dry screeds from the GVL over the claydite screed fallowly according to the budget and specific minds.
Please! If you need maistry for repairs, it’s also a good service for your selection. Just click on the form below report description robit yakі need vykonat and before you come to the mail propositions with prices from private companies, repair teams and firms. You can marvel at the videos about the skin of them and the photos with the butts of the robot. It's COST-FREE and doesn't goiter anything.
- How to install beacons
- fill cement screed do-it-yourself pidlogs
How to make a screed with your own hands? Screed pіdlogi є the widest way to virіvnyuvannya pіdlogi. Won to come for any kind of finishing coat. It is possible to install a heating system with it. Irrespective of those that filling in the logs is a laborious process, you can do it yourself. How to build a screed under the logs independently?
Concrete screed using the water proofing method. Before the cob, it is necessary to prepare the surface of the base. At the same time, sticks and other deformations of the overlapping slabs are laid. Before pouring the cement screed, it is necessary to seal the waterproofing of the base.
The thickness of the cement screed is not less than 50 mm. Tse allows you to secure a good mentality. To improve the mentality, you can armuvati. For whom vikoristovuyu metal mesh. Її expand closer to the surface, to the fact that there will be the most exciting.
To change the amount of sumish, you can fill it up again. As for the most part, vicorist is expanded clay. Add yoga to the sumish and create a supporting ball. Let's pour the main ball into concrete without expanded clay on the new one. Zavdyaki tsyomu can be spared cement rozchiny and make it easier to cover the vag.
Do-it-yourself screed laying
Materials and tools:
- the cement bag is ready;
- weekly rіven;
- beacons;
- waterproofing;
- rule;
- self-tapping;
- perforator with mixer nozzle;
- betonozmishuvach;
- rubbing.
It is necessary to prepare the base before pouring cement difference. For this, you need to clean the underlayment of the dirt and the vikonati її priming. Then we will need to lay all the seams of the overlapping slabs and seal them with rose cement walls. This is necessary, to prevent leakage. With this method, it is possible to build a waterproofing.
Then we will fight for the help of the budding or laser line on the surface of the sub-logs, revealing the real place of the foundation. Vono is a landmark for the placement of beacons and for the selection of comrade screeds.
Let's install beacons. The stench is needed for cement distribution. Without their installation, it is impossible to create a smooth surface. Lighthouses are direct, by which you can change the rule when pouring concrete. Їx is installed fairly. The stench mayut buti roztashovanі on vіdstanі 20 cm vіd stіni. Vіdstan mіzh them can be 30 cm less for a long time of the rule, for the help of which concrete can be leveled.
Directly can be metal or custom made. Rozchinni directly install so. There, de maє buti beacon, you need to lay the cement. Let's help the rules to formulate a special maidanchik on the sum, which will confirm the equal of the pidlogs. Then we remove excess cement.
To ask for the installation of retail beacons, to win such a lighthouse. It is necessary to insert the back of the head into the base with 2 screws along the line of placement of the beacons. They gag so that the top of the self-tapping droplet was on the even surface. Then we will install retail beacons. In case of self-tightening, they are victorious like intermediates, so they do not allow the beacon to be installed lower, lower is necessary. After zastigannya concrete proceed to pouring.
Turn to hell
How to install beacons
Metal beacons are technologically advanced. When they are installed, the quality of the cover moves. The stench buvayut zavtovshki 10 mm and 6 mm. For the folding of the screed, sound the vicorist beacons of the shutter 10 mm.
Їx is installed in such a way. Screws are screwed on the back and the bag is thrown on the same way, like when folding retail beacons. Let's put a metal beacon on top of it. If for some additional reason the concrete is pressed into the dots, the dots do not stick with the screws. Then we remove the excess rozchin.
The beacon is pressed into the cement in such a rank that I didn’t squander yoga sumish on the surface. At the same time, the lighthouse can be pressed in, which can be changed to change the quality of the cement.
There is one more way to install metal beacons. At the same time, a vicorous element is made from a beacon. With the help of yoga, the lighthouse is installed behind the river.
Potim, to increase the thickness of the lighthouse, to apply the foundation cement sum. In this rank, the lighthouse is smeared into cement. If the cement is caught, the lighthouse can be broken.


